Your basket is currently empty!
How to Re-Pot Orchids: A Comprehensive Guide
Orchids are delicate and beautiful flowers that require special care to thrive. One of the important aspects of taking care of orchids is re-potting them. Re-potting helps to provide the plant with fresh soil and a new container to grow in, ensuring that the roots have enough space to grow and absorb the necessary nutrients.
In this guide, we will discuss the steps for re-potting orchids, including when to re-pot, what materials you will need, and how to properly care for your orchids after re-potting.
When to Re-Pot Orchids
Orchids should be re-potted every 1-2 years, depending on their growth rate. You can determine if your orchid needs to be re-potted by checking the roots. If the roots are tightly packed and there is no room for new growth, it is time to re-pot. Additionally, if the leaves are yellow or the plant is not blooming, it may be due to a lack of space in the container.

What Materials You Will Need
Before you begin the re-potting process, it is important to gather the necessary materials. You will need the following items:
- Orchid plant
- Potting mix specifically designed for orchids (Click Here)
- Container with drainage holes
- Scissors or pruning shears
- Gloves (optional)
Step-by-Step Guide to Re-Potting Orchids
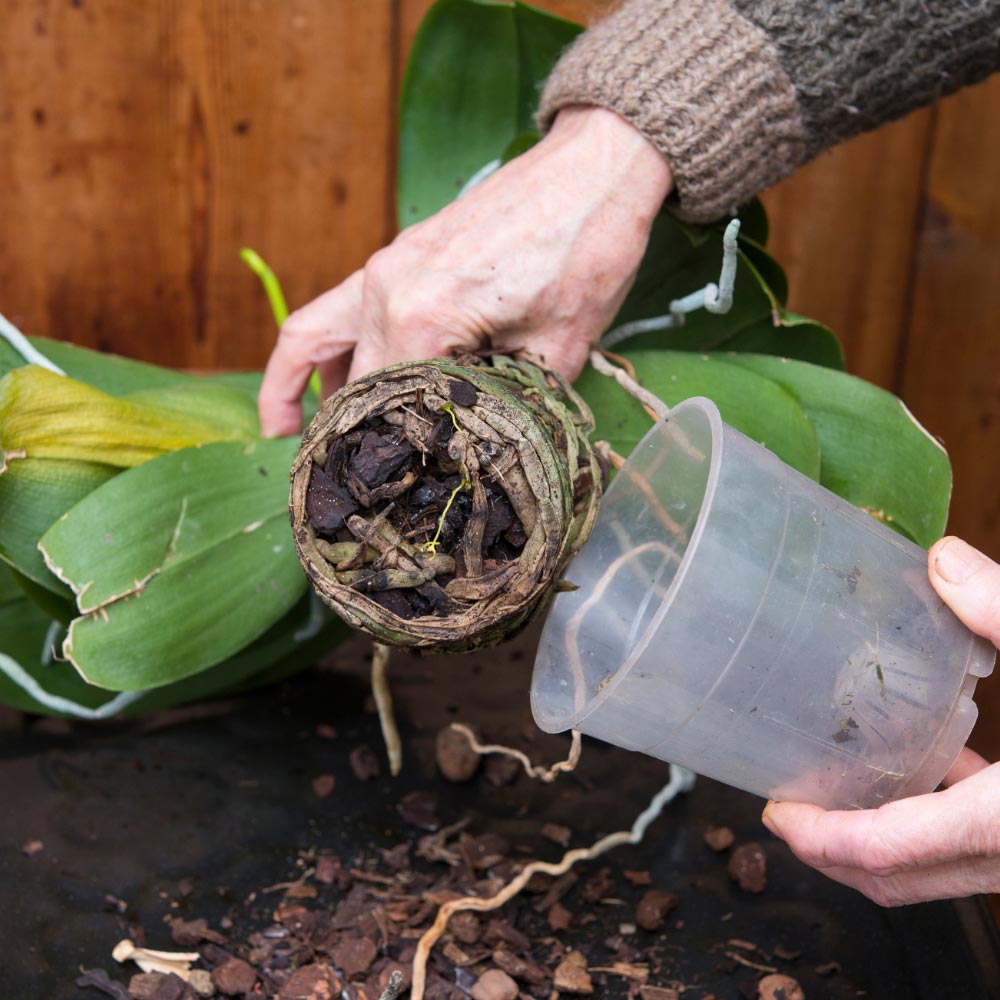
- Choose a container that is one size larger than the current container. Ensure that the container has drainage holes to prevent water from standing in the pot and causing root rot.
- Mix the potting mix with water until it is damp but not soaking wet.
- Place the orchid in the new container, making sure that the roots are covered with the potting mix.
- Fill in the sides of the container with the potting mix, gently pressing it down to eliminate large air pockets.
- Water the orchid thoroughly, making sure that the potting mix is completely saturated.
- Place the orchid in a location with bright, indirect light and good air circulation.

Proper Care After Re-Potting
- Water your orchid once a week, making sure that the potting mix is evenly moist but not soaking wet.
- Provide bright, indirect light and good air circulation to prevent root rot and promote healthy growth.
- Fertilize your orchid once a week with a balanced, Orchid Mist Spray.
- Prune any dead or yellowing roots to promote healthy growth.
- Watch for signs of pests, such as spider mites or scale insects, and treat promptly if necessary.
Conclusion
Re-potting orchids is an important aspect of their care that should be done every 1-2 years. By following the steps outlined in this guide and providing proper care after re-potting, you can ensure that your orchids thrive and bloom for years to come.
FAQs
- How often should I re-pot my orchids? – Orchids should be re-potted every 1-2 years, depending on their growth rate.
- What kind of container should I use to re-pot my orchids? – It is best to use a container with drainage holes that is